Locate the collar → Separate the surfaces
Check the process → Describe before diagnosing
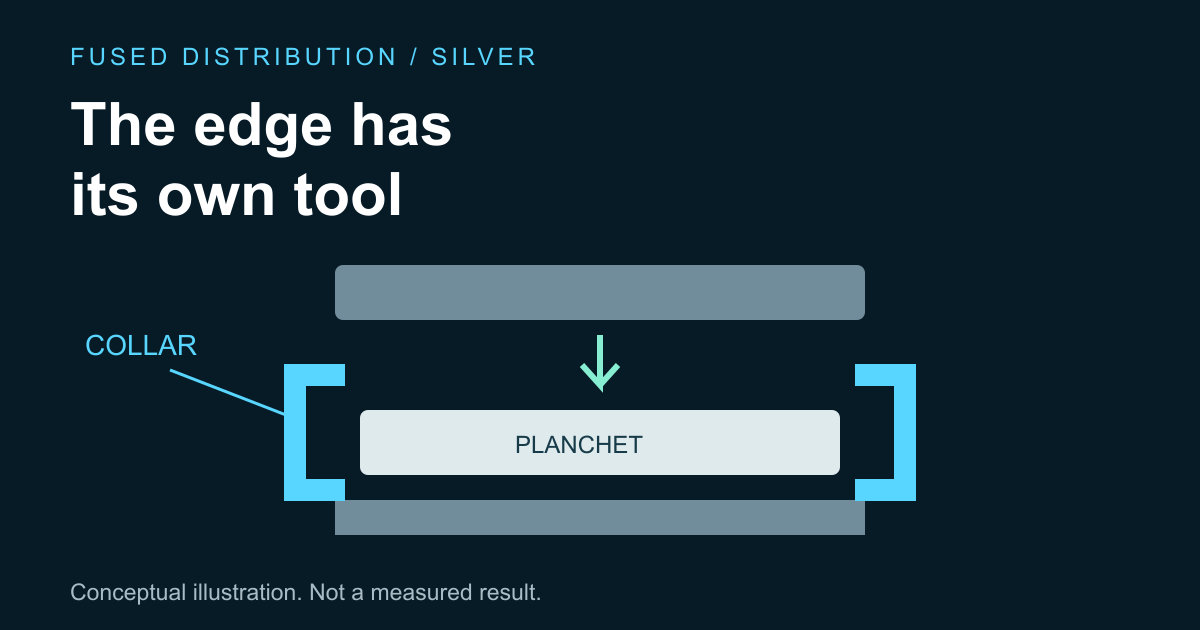
A coin collar surrounds the planchet during striking. While the dies form the two faces, the collar limits outward expansion and helps form the edge. Thinking of the collar as a boundary around the metal makes its role easier to understand than treating every feature as something made by a face die.
This guide explains that role using the U.S. Mint's production description. It is manufacturing background, not a method for authenticating a coin or diagnosing a mint error from a photograph. Individual products and production routes need their own documentation before you can connect an observed feature to a particular operation.
Locate the collar in the striking process
The Mint explains that the two dies press against a planchet while a collar surrounds it. The collar controls outward movement and can create a smooth, reeded or lettered edge. This is why an explanation of the two face dies alone leaves out part of the tooling involved in producing a coin.
Imagine an intentionally simplified cross section: one die above, one below and a boundary beside the metal. This mental picture shows different jobs, not the dimensions or construction of a real press. Do not use a conceptual illustration to infer a machine's setup, operating force or tooling tolerances.
Our guide to coin blanks and planchets covers the metal before striking. Keeping the workpiece and the tools separate in your notes helps avoid calling the collar a part of the finished coin. The collar is tooling; the visible edge is a feature of the product.
Separate the coin edge from its faces
When looking at a coin, describe which surface you mean before describing its appearance. A photograph taken straight at a face may show little of the edge. An angled view can introduce shadows that make a surface look more irregular than it is. Record the view and lighting alongside your observation.
The rim and edge also need distinct wording. The Mint describes forming a raised rim before striking through upsetting. The collar has a different job during the strike. Our explanation of coin dies transferring a design addresses the face tooling so the three roles can be considered separately.
A useful learning exercise is to draw three labels around an ordinary coin photograph: face, edge and rim. Treat the labels as orientation aids only. If the image does not show one of those areas clearly, write that it is not visible instead of filling the gap with an assumption about how it must look.
Check how a specific coin gets its edge
Do not assume every edge inscription is made during the main strike. The Mint describes dollar coins receiving a smooth edge in the collar before a separate machine applies lettering. That exception is a good reason to look up the process for the actual product rather than extending a general diagram to every coin.
For a particular issue, start with the issuer's description and record the product name, year and relevant process wording. Keep the source beside your notes. If you have only a general production overview, label your explanation as general background. It should not quietly become a claim about an item whose production details you have not checked.
This distinction is especially useful when comparing two pieces with visibly different edges. The difference might be expected for those products. First establish what each product is documented to have. A comparison without that context can turn an ordinary design difference into an unsupported claim that something unusual happened at the mint.
Describe observations before assigning a cause
If an edge interests you, begin with neutral observations and clear photographs. Note where the feature appears and whether it continues around the circumference. Avoid cleaning or altering the object to make a theory easier to photograph. Keep existing packaging and identifiers with the record so later review can use the original context.
An observation such as “this portion looks different in this view” is narrower than a diagnosis about a collar malfunction. Manufacturing terminology can make a guess sound authoritative without adding evidence. Separate what the image shows, what documentation says should be present, and what remains a question for someone qualified to examine the item.
Do not infer authenticity, rarity or market value from the collar explanation. Those are different questions requiring different evidence. If a financial decision depends on identifying an unusual feature, obtain an appropriate independent assessment. A short educational article cannot substitute for inspecting the actual object and its supporting records.
Build a useful coin production note
Keep a small reference entry with the tool's name, its location in the process and the source you used. Add a simple drawing only if it clarifies the relationship between the dies, planchet and collar. Mark it conceptual so nobody later mistakes it for a production drawing with measured dimensions.
The useful takeaway is the division of work: the dies address the faces, while the collar surrounds the metal during striking and helps establish the edge. Use that distinction to ask better questions about a documented production process. Leave product identification, error attribution and valuation outside the claim unless you have evidence for those separate conclusions.
Sources
- U.S. Mint coin production: collar, dies, upsetting and the separate dollar edge lettering step. Observation guidance is an original suggested learning method.
Related
Read next: Follow a design from die to coin.